How to Generate Your First Dependency Chart
Choose Your Preferred Search Method
The Dependency Mapper offers two flexible ways to search and visualise your Jira dependencies: Basic Search and JQL (Jira Query Language) Search.
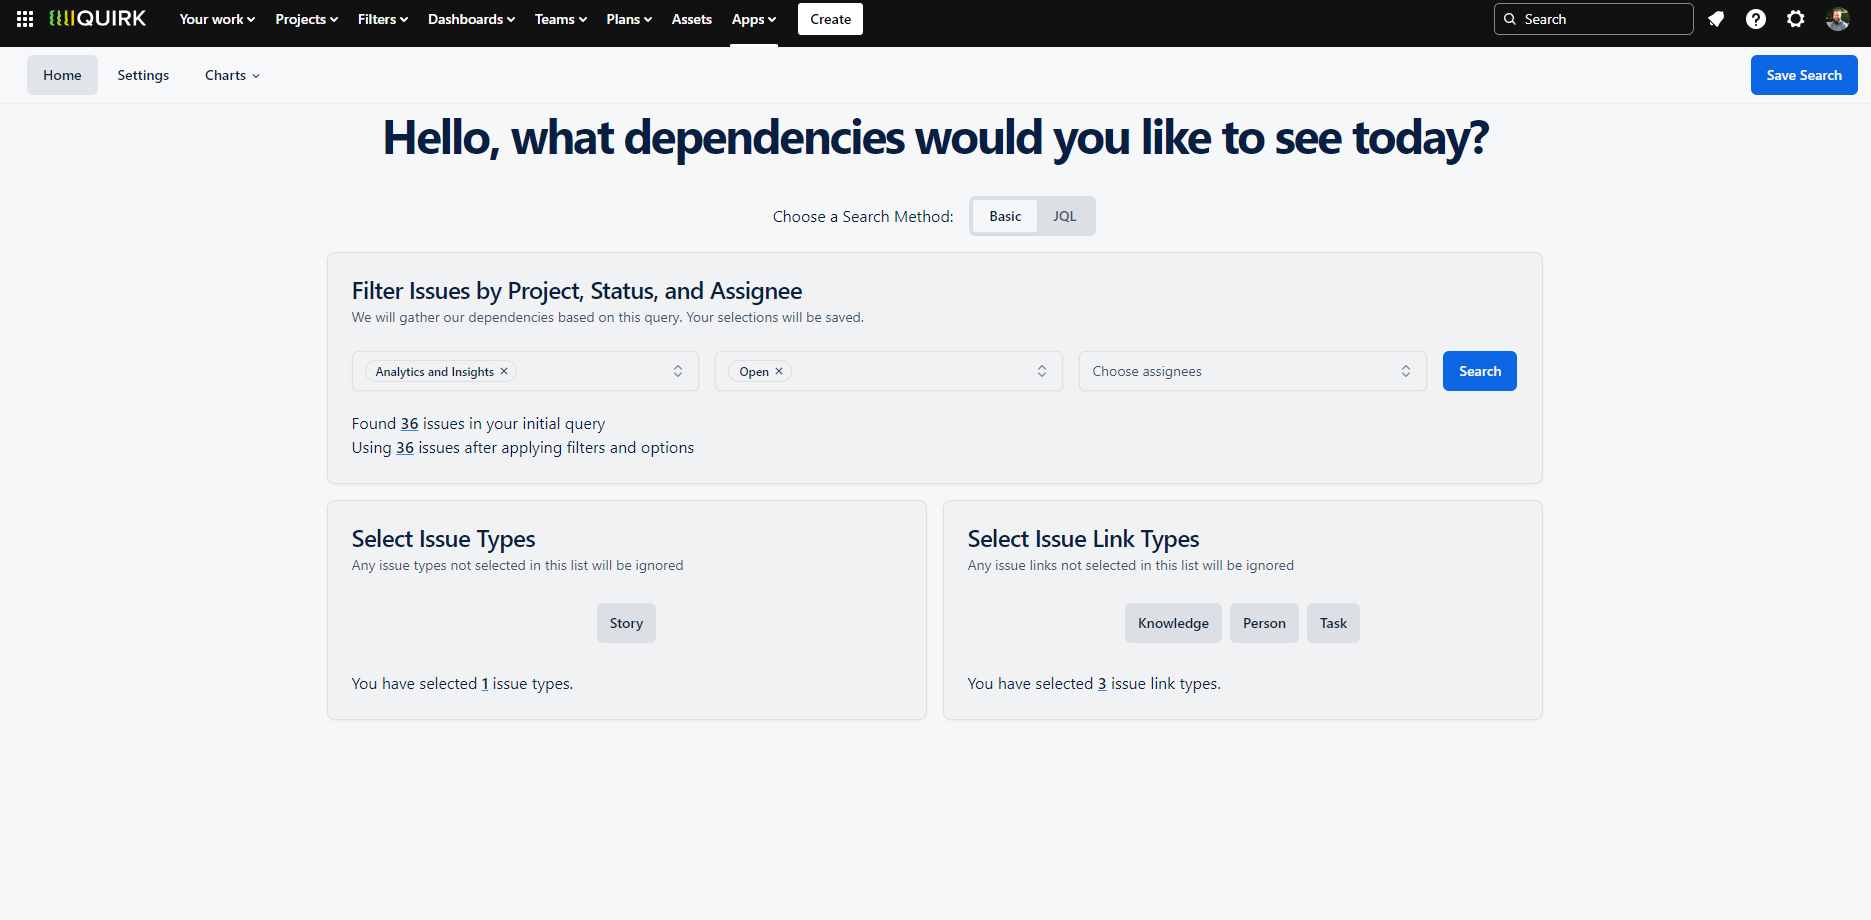
Basic Search provides an intuitive, dropdown-based interface where you can quickly select fields and criteria to find related issues, similar to Jira's basic search experience.
For users who need more precise control, JQL Search lets you write custom queries to define complex dependency relationships and filter conditions.
Whether you're new to dependency mapping or an experienced Jira power user, both options help you generate insightful visualisations of your issue networks.
Basic Search
Basic Search simplifies the process of finding and mapping Jira dependencies through three key dropdown filters: Project, Status, and Assignee.
Start by selecting one or more projects to define the scope of your dependency map. Then, narrow down your search by choosing specific issue statuses (like 'In Progress' or 'Done') and assignees to focus on particular team members' work. Once you've set your criteria, click the 'Search' button to generate a visual map of all dependencies that match your selections.
This straightforward approach makes it easy to quickly visualise relationships between issues without needing to craft complex queries.
For example, you might select:
Project: Mobile App Development
Status: In Progress
Assignee: Sarah Chen
This would create a dependency map showing how Sarah's in-progress mobile app issues connect to other work items across your Jira instance.

Basic Search lets you map dependencies using simple dropdown menus. Select your issue types, fields and filters to quickly generate a dependency chart – no JQL knowledge required.
JQL Search
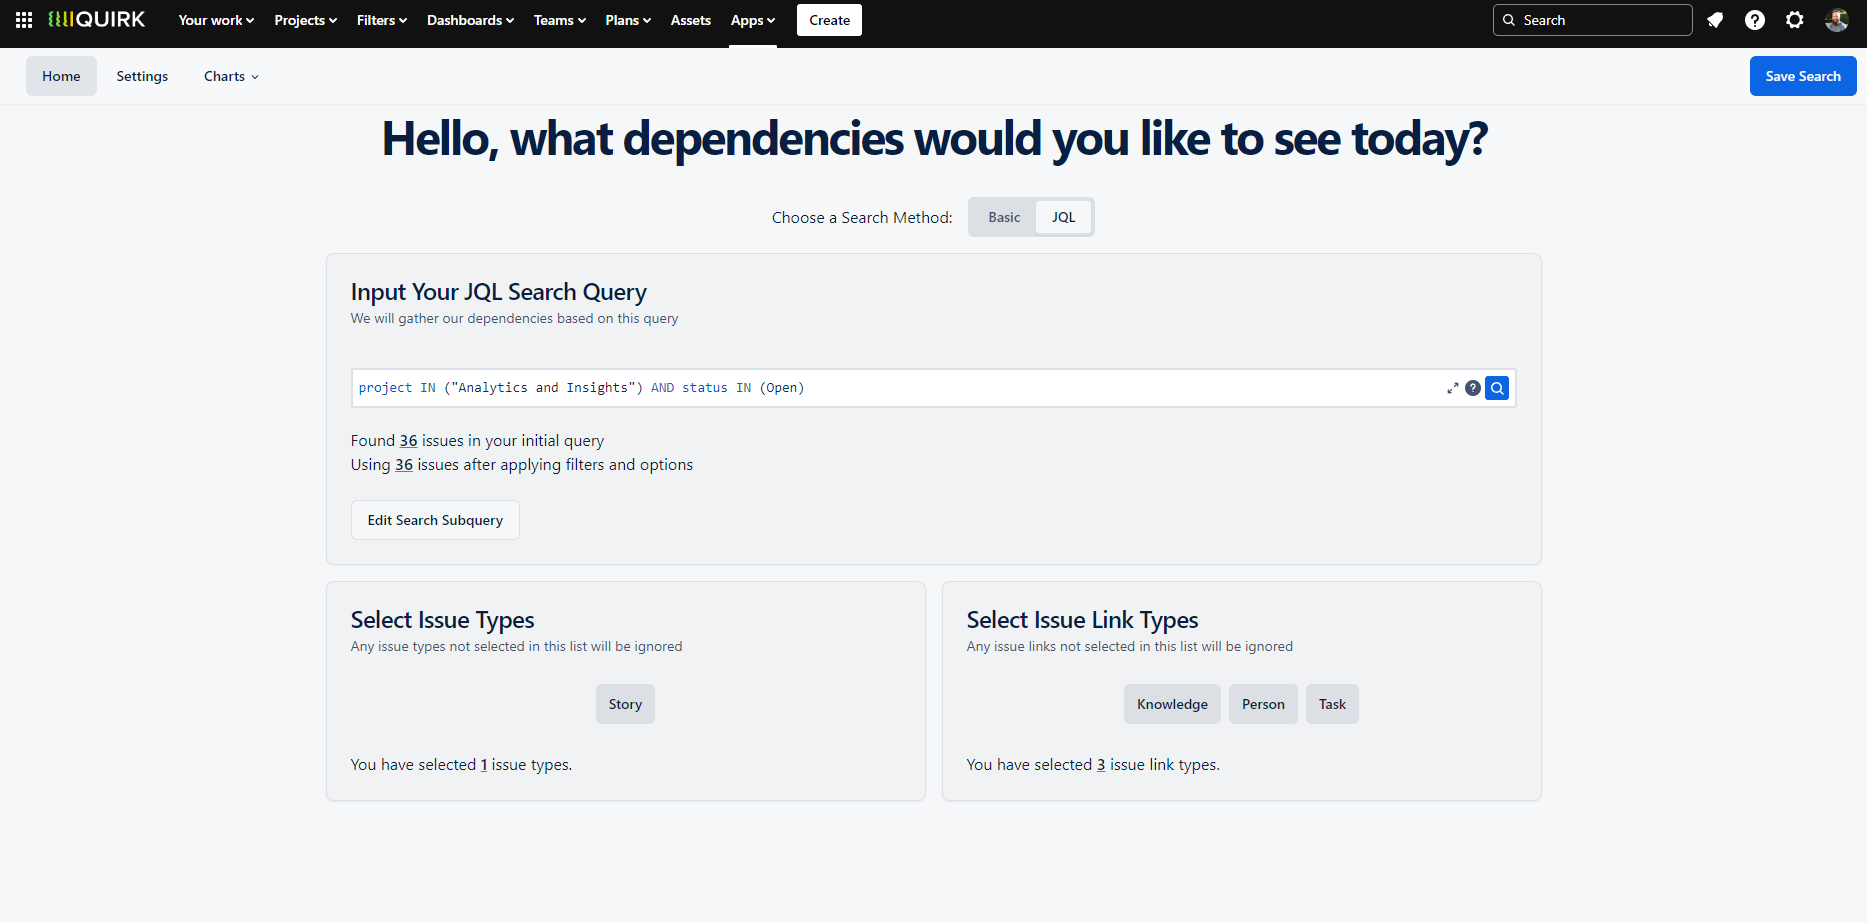
JQL Search provides advanced users with the full power of Jira Query Language to create precise dependency maps. If you're familiar with JQL from Jira's native search, you'll feel right at home. Simply write your query using the same syntax to define which issues you want to map and click the blue 🔍 search icon to perform the search .
The Dependency Mapper extends JQL's capabilities through its unique Subquery feature, which helps overcome Jira's built-in limitations around issue link filtering. The Subquery acts as a secondary JQL statement that works in conjunction with your primary query. You have two ways to use Subqueries:
Include: Creates an intersection between your main query and subquery, showing only dependencies where issues match both criteria. For example, your main query might find all bugs in your project, while your subquery ensures only high-priority ones appear in the dependency map.
Exclude: Removes the intersection from your original query results. This is useful when you want to filter out specific issues from your dependency map. For instance, your main query could find all active issues, while your subquery removes those assigned to the maintenance team.
For those comfortable with JQL, this advanced search option offers granular control over your dependency visualisations and helps you create highly specific issue relationship maps.

Advanced JQL Search offers precise dependency mapping using Jira Query Language, with additional Subquery options to refine your results using Include or Exclude filters.
Then, Choose Your Preferred Dependency Chart!
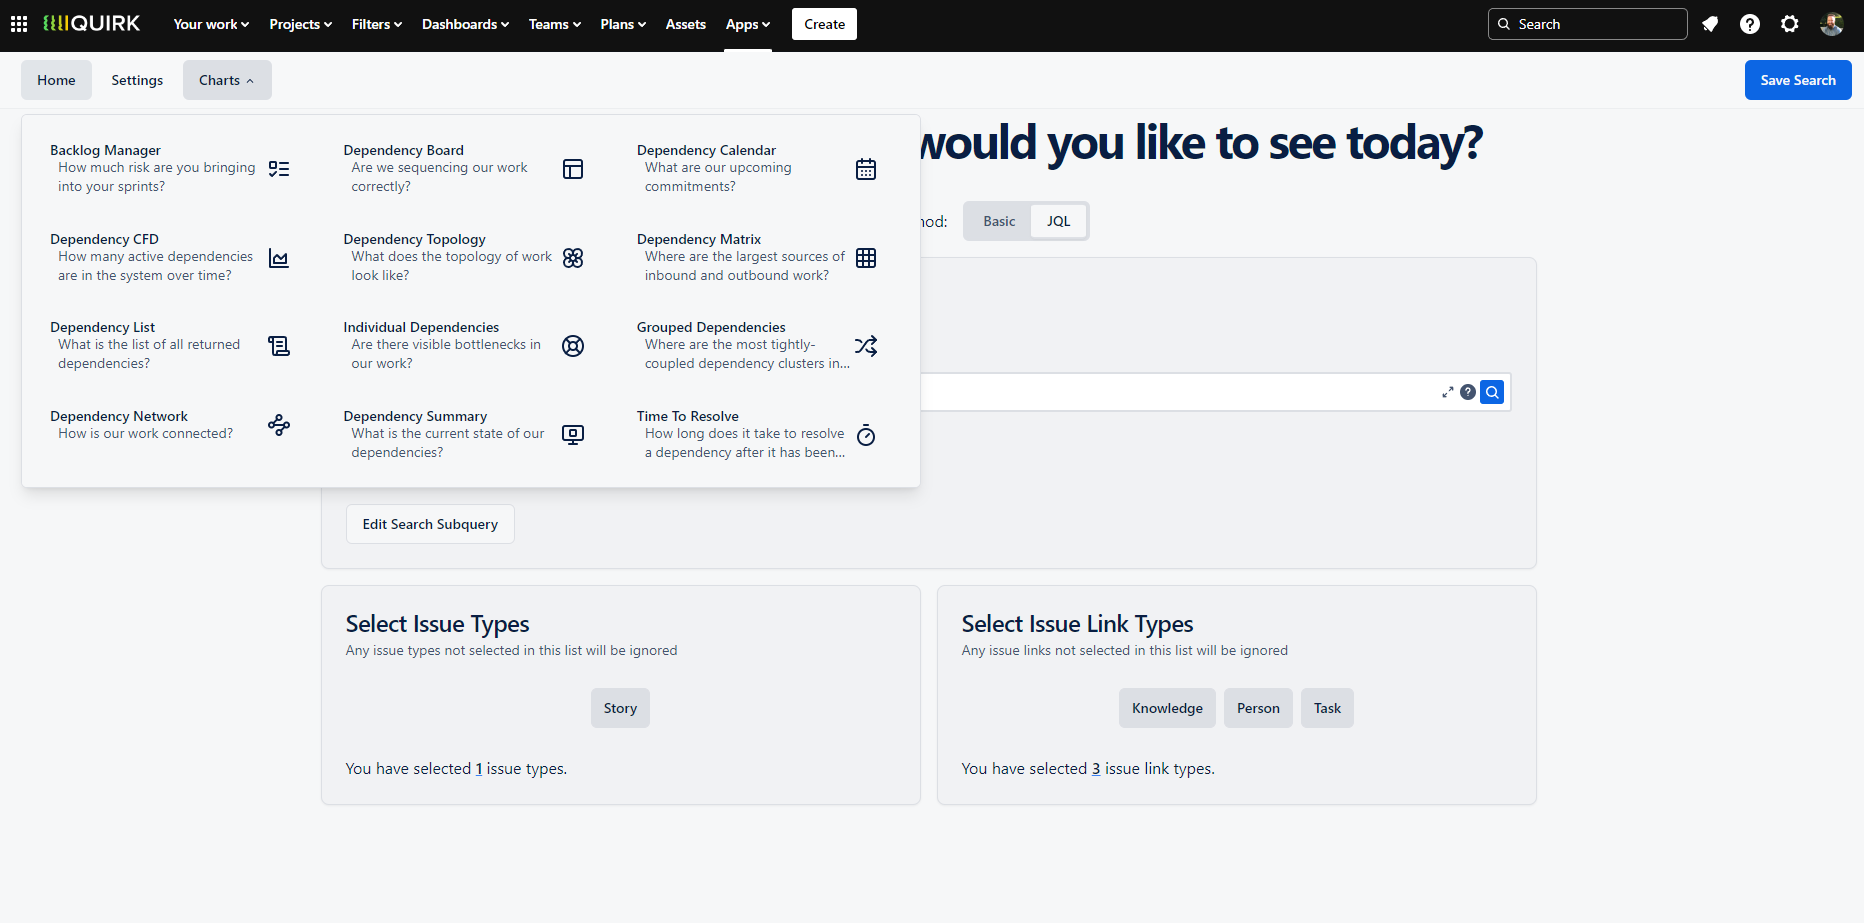
Once your search has found a set of linked issues, creating your visualisation is simple. Navigate to the Charts section in the top menu bar to explore different ways to display your dependencies. Here you'll find various chart types to help you understand and communicate your issue relationships effectively.
We recommend starting with the Dependency Board, which provides a clear, intuitive view of how your issues connect to each other. This visualisation helps teams quickly identify dependencies, bottlenecks, and the overall flow of work across your projects.

Select your preferred chart type from the Charts menu to visualise your dependencies. The Dependency Board is an excellent starting point for most teams.
